


Upgrading BIOS with Ubuntu

One of the first things I do after get a new machine is to verify in the manufacturers site for new BIOS versions. In case of Dell, the BIOS updates are .exe files, and they run under Microsoft DOS.
So, the question is: how to upgrade/flash BIOS using Ubuntu?
Option 1: modern motherboards have a single BIOS file to download, you just save it into a USB memory stick. Then you can boot your computer into the BIOS, select the file location and upgrade.
Option 2: if option 1 is not an option (duh!), you can use a pendrive with FreeDOS.
And this is the option that I’ll cover in details here.
In the Ubuntu Wiki, there are other procedures to use, but this is the one which is closest to the original procedure (update the BIOS under DOS).
Before start, we need to discover which is the service tag for your machine, in order to use it to get check for newer BIOS versions.
Obtaining BIOS version and Service Tag
The service tag is saved in your BIOS. If you want to query it under Linux, you’ll need to install the dmidecode program, which is a program to return several BIOS values, including the version too.
Install with:
sudo apt-get install dmidecode
Then, query the BIOS version with:
sudo dmidecode -s bios-version
And finally, query the service tag with:
sudo dmidecode -s system-serial-number
Looking for newer BIOS versions
Now with your service tag in hands, go to Dell support website, then find the Enter a Service Tag or Express Service Code section. Insert your service tag and press Enter to submit.
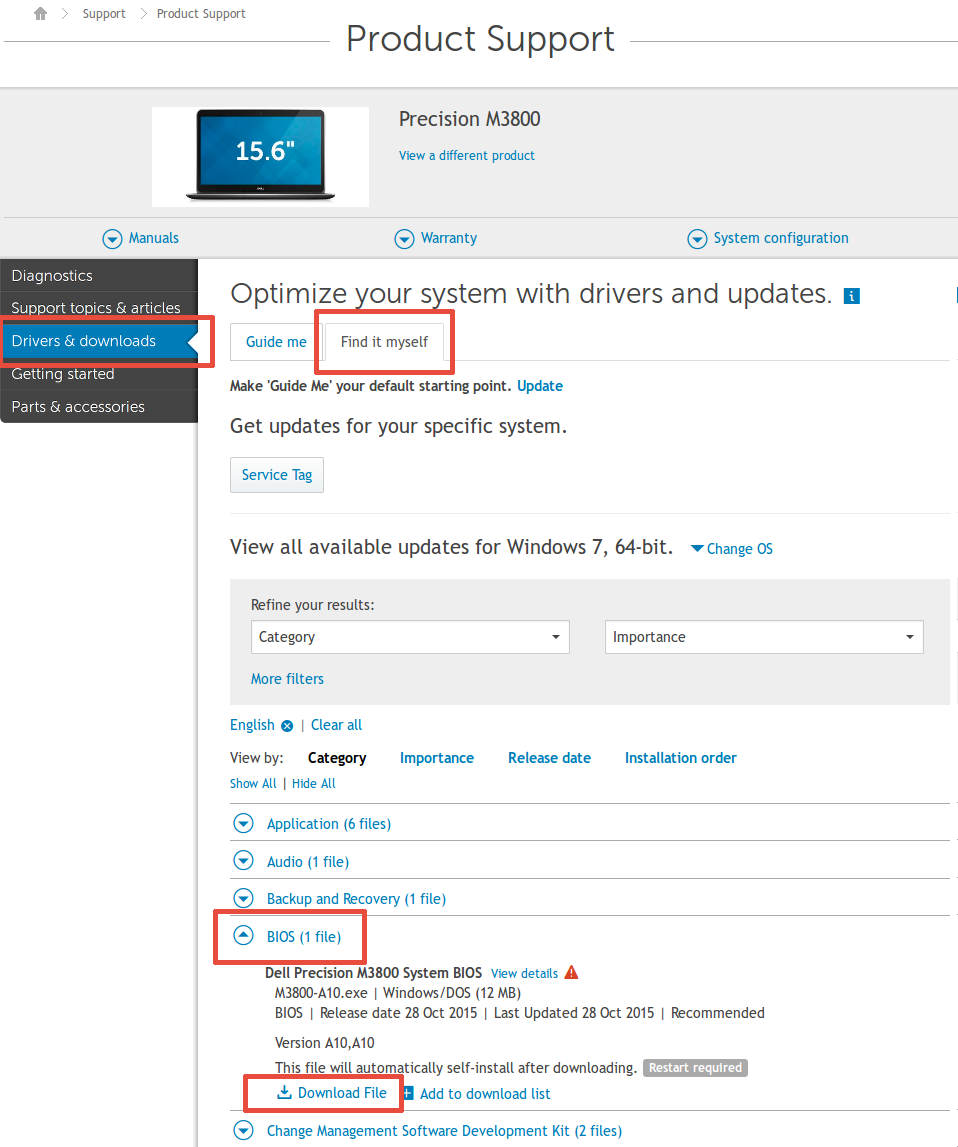
At the Product Support page, click on Drivers & Downloads.
Then click on Find it myself tab. Click to expand BIOS section and then download the file clicking on Download file.
Save the file. If compressed, extract it.
Download FreeDOS
In http://www.chtaube.eu/computers/freedos/bootable-usb/#download site, there are 3 FreeDOS images: one to boot over the network; other for pendrive with storage between 256MB and 2GB; the latest one to sticks larger than 2GB.
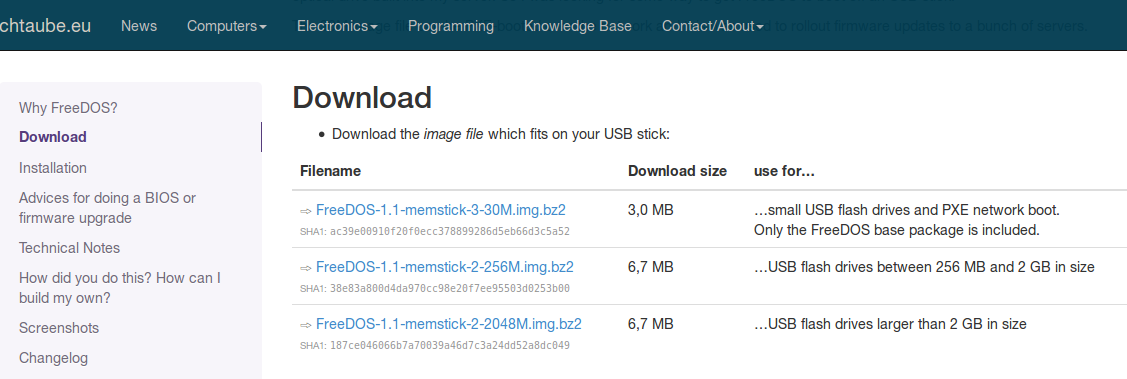
I’ve downloaded FreeDOS-1.1-memstick-2-2048M.img.bz2 file, as my USB stick has more than 2GB.
Of course, download the one according the size of your pendrive.
Now extract FreeDOS.
Creating a bootable FreeDOS USB flash drive
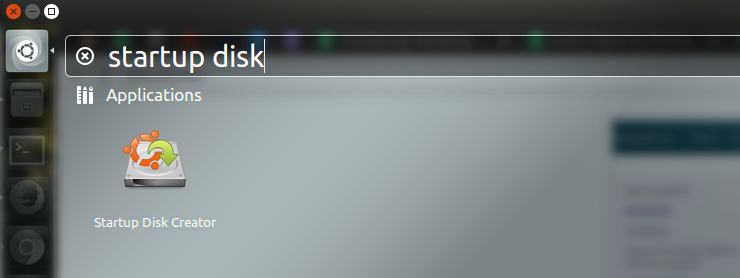
Now insert your stick in the USB port. And open the Startup Disk Creator:
Go to Source disc image (.iso) or CD section and:
- click on the
Otherbutton - in the file selection dialog, filter by
Disk Images - select
FreeDOS-1.1-memstick-2-2048M.imgfile
Now in the Disk to Use section at the bottom, select your stick (in case it’s not automatically selected).
Click on the Make Startup Disk.

This will take a while. At the end of the process, it’ll ask your password to create the boot section in the USB stick.
After finish the process, it’ll display a success dialog and close.
Now, safely remove the USB pendrive.
Copy the new BIOS to the USB flash drive
Plug your USB in your computer again, and now copy the new BIOS to it. Make sure you’re copying the extracted file (the one with .exe extension).
After make sure the file was copied, it’s time to restart your machine.
Updating BIOS
After restart your machine (and make sure BIOS is configured to boot using USB drive), syslinux will display few boot options (fdos, odin, memtest). Just press Enter to load the default option (fdos).
Next, you’ll see the following FreeDOS options:
1 - Load FreeDOS with JEMMEX, no EMS (most UMBs), max RAM free
2 - Load FreeDOS with EMM386 (Expanded Memory) and SHARE loaded
3 - Load FreeDOS including XMGR XMS-memory driver
4 - Load FreeDOS without drivers
Select option 4 - Load FreeDOS without drivers.
Now check the files inside the flash drive, using the dir command:
dir
And the newest BIOS must be displayed in the list, with the .EXE extension.
Type the full file name and press Enter: the update process will begin.
Wait until it finishes (it’ll go back to FreeDOS). Done, you can remove the USB stick and restart your machine.